Sunday 17 February 2013

Italeri Land Rover with Azimut ADV SWB conversion set.

Last week I got the newish Azimut hard cab and short wheel base conversion set for the Land Rover.  It was designed for the Tamiya "Pink Panther" kit, which was a Series 2 long wheel base version used by the British Special Air Service in the 1960s for desert operations.  Tamiya's kit is still pretty common, but there are so many bits of little use for civilian vehicles that I decided to use one of the reissued and retooled Italeri Series 3 British Army long wheel base kits.

Azimut's kit contains the cab roof and rear wall, doors, windscreen, civilian rear cross-member, short wheel base rear wings and a shortened rear chassis section.  You also get a sheet of acetate for the windows.
The instructions are clear, but use the Italeri drawings for some reason, but the conversion details are very clear and I think it would be difficult for a competent modeller to ruin it.

There are some points to watch... such as making sure the cab fits properly, which is the most difficult part of the conversion.  Cutting the cargo bed and chassis down didn't present any problems for me, although, as usual, I superglued myself to the chassis!  I also used the Italeri civilian cross-member as the resin one was a bit rough in my kit.

I also used the Italeri doors and windscreen as they didn't need replacing,  Unlike my military Series 3 Land Rovers I opted to stick with Italeri's tyres.  They aren't perfect but they will further differentiate it from the green and black ones.

As a final detail touch I added a pair of Firing Line Land Rover mudguards... most civvy Rovers I've seen sport them.

Once complete the model really looks the part and is certainly a pleasant change from the military ones on my workbench.  At the moment it is built up into painting sub-assemblies, waiting for decent weather to give it a blast or two.


At the moment I have no idea of the colour scheme or role it will be put to... I will just have to keep my eyes open.

Back to less sturdy vehicles the next time... ^_^

Saturday 9 February 2013

Mini Minor parts breakdown

With the Showa diorama complete it's now time to move on (I know, I still have the Mazda R360's seats to paint), and this is the parts breakdown for the ex Airfix Mini Minor.
I have been having a hard time on the Airfix Tribute Forum trying to convince them that this is not a slot car.  So this brief photo update is to show anyone that the MRRC Morris Mini Minor/Austin Se7en kit is the Airfix kit rebagged.


On another note, I have started on the Bilek UAZ 452 van... nothing much to show as yet, but initial impressions are of a limited run model, albeit one with a lot of detail.  The plastic has a chunky feel, and the parts are not numbered, so constant checking with the sprue map is a must.  Going to be fun and games when I start adding the etched parts!

Monday 4 February 2013

Best laid plans...

Well I had hoped to report that the Mazda saga was over... but I got distracted by painting a couple of figures.

The first was the girl for the Showa era diorama for small cars.  As I mentioned last time she is a Vietnamese girl made by Masterbox for their Vietnam War series of figures.  In this scale she works fine as a generic Asian girl... She is 2" tall, no-one can tell where she's from!


It's been many years since I painted figures this size, and the amount of detail sculpted into her face was certainly a huge help!
I used acrylics throughout, which are not as easy to work with on figures as I remember.  I may have to resort to the tried and tested method of using oils for skin tones.

This diorama now only needs the bike added, and some sand between the garden paving stones.


The next diorama on the conveyor is for the Airfix BMW Mini Cooper S.  This will represent a side street in Chiba Prefecture, Japan (based on one in a town I stayed in called Minami Nagareyama), and will include a wall and chain-link fence on top.  The car will be parked up while its young lady driver is leaning on the wall waiting for a pal or her boyfriend.

This is the basic layout...


The 'stop' sign on the road will be applied by using the printout as a stencil and stippling the white through it and onto the tarmac surface.

The girl with the car is the previously shown Aurora Models figure, but she was a pain to paint.  I love these figures to bits, but the lack of any detail on the face makes it a huge challenge... probably not the best choice for returning to figure painting.  Ho-hum.  When I've got properly back into the painting side of things again I'll repaint her in oils.
Apologies for the awful eyes...


 I still need to paint her belt and add a logo to her top.


In addition to working on these, my Bilek UAZ 452 Ambulance arrived from the Czech Republic today, and it's a nice kit.  The parts are flash free, although a little on the thick side.  It has a large sheet of etched detail parts, a good decal sheet, very detailed instructions and nice (if very shiny) rubber tyres.  The box looks a bit dated, and is completely devoid of any logos or descriptions to mar the artwork.

Here's what's in the box!


One curious item is this reference document... it a lovely touch and will aid any competent modeller should they wish to detail the van to the ultimate!  As I said previously, mine will be built as a civilian vehicle imported into Japan and used by a rural onsen hotel.


Another update in a few days ^_^

Saturday 2 February 2013

Last Lap and New Plans

A nice bright (cold) February morning and I am putting the finishing touches to the first of the Showa mini dioramas.  The telephone pole is in place, the ladder secured and a bucket of water ready for the owner of the unseen house to clean the dusty fence.
I still have the door handles to put onto the gate, some more weed to tie the bottom of the pole into the ground and paint the edge of the base black.


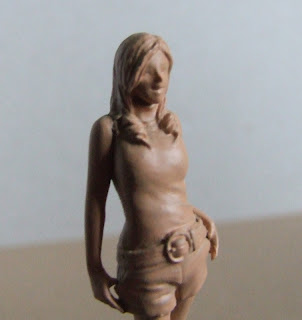
This is the figure which will be waiting outside the gate.  Originally a Masterbox Vietnamese girl, but in this scale she could easily pass for a Japanese girl of the 1960s...


And so the next diorama and car projects take their place in the queue.  Originally I was going to do the classic Mini in the camping site setting, but I still need better windows for the car, so it's been pushed back one.  The Airfix BMW Mini has taken its place.
The car will be parked up near in a small quiet road in Chiba Prefecture, Japan in the present day, and for accuracy's sake I have made up number plates for the area, based on a real car's plates.  I won't say what type or model.  I used the Fujimi 1/32 number plate making set of rub-down numbers and characters with plate decals.


I have also undercoated the Aurora Models figure I bought to go with the car...


I think painting her is going to be a fun job ^^

Just for interest's sake I compared the two Minis for size... the BMW version is a Mini in name only!


Finally I have started gathering references for the rural shrine I want to build.  I will have a section where cars up to Gloria size can be posed, making it larger than the others.  It's too easy to make these car bases cramped and unnatural.  Here are some of the models to feature in it:


I really need to get the Mazda's interior done this weekend, so fingers crossed I can get it done.

See you soon...